Kia Optima DL3: Light bulbs / Glove box lamp bulb replacement. Trunk lamp bulb replacement
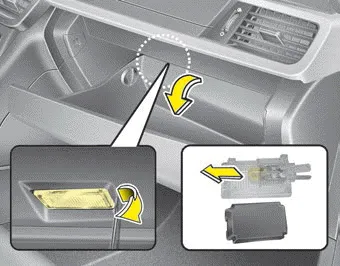
1. Using a flat-blade screwdriver, gently pry the lamp assembly from interior.
2. Remove the bulb by pulling it straight out.
3. Install a new bulb in the socket.
4. Install the lamp assembly to interior.
✽ NOTICE
Be careful not to dirty or damage the lens, lens tab, and plastic housings.
Trunk lamp bulb replacement
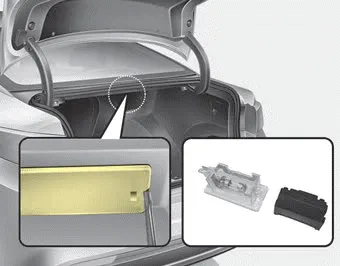
1. Using a flat-blade screwdriver, gently pry the lens cover from lamp housing.
2. Remove the bulb by pulling it straight out.
3. Install a new bulb in the socket.
4. Align the lens cover tabs with the lamp housing notches and snap the lens into place.
✽ NOTICE
Be careful not to dirty or damage the lens, lens tab, and plastic housings.
Room lamp bulb replacement ■ Type A ■ Type B WARNING - Interior lamps Prior to working on the Interior lamps, ensure that the “OFF” button is depressed to avoid burning your fingers or receiving an electric shock.
Other information:
Kia Optima DL3 2019-2026 Service and Repair Manual: Keyless Entry And Burglar Alarm
Specifications Specification Item Specification Operating temperature 14 - 140°F (-10 - 60°C) RF Modulation FSK RF Frequency 433.
Kia Optima DL3 2019-2026 Service and Repair Manual: Power Seat Motor
Components and components location Components 1. Lumbar support motor 2. Reclining motor 3. Front height motor 4. Rear height motor 5. Slide motor Repair procedures Inspection 1.
Categories
- Manuals Home
- Kia Optima Owners Manual
- Kia Optima Service Manual
- Lift And Support Points
- Automatic Transaxle System
- Floor Console Assembly
- New on site
- Most important about car
